Creating your first Xamarin.iOS project
To make sure you development environment is properly setup, we are going to create the traditional Hello World app for iOS.
Create a new project from template
Using the template, choose iOS and then select the Single View App template.
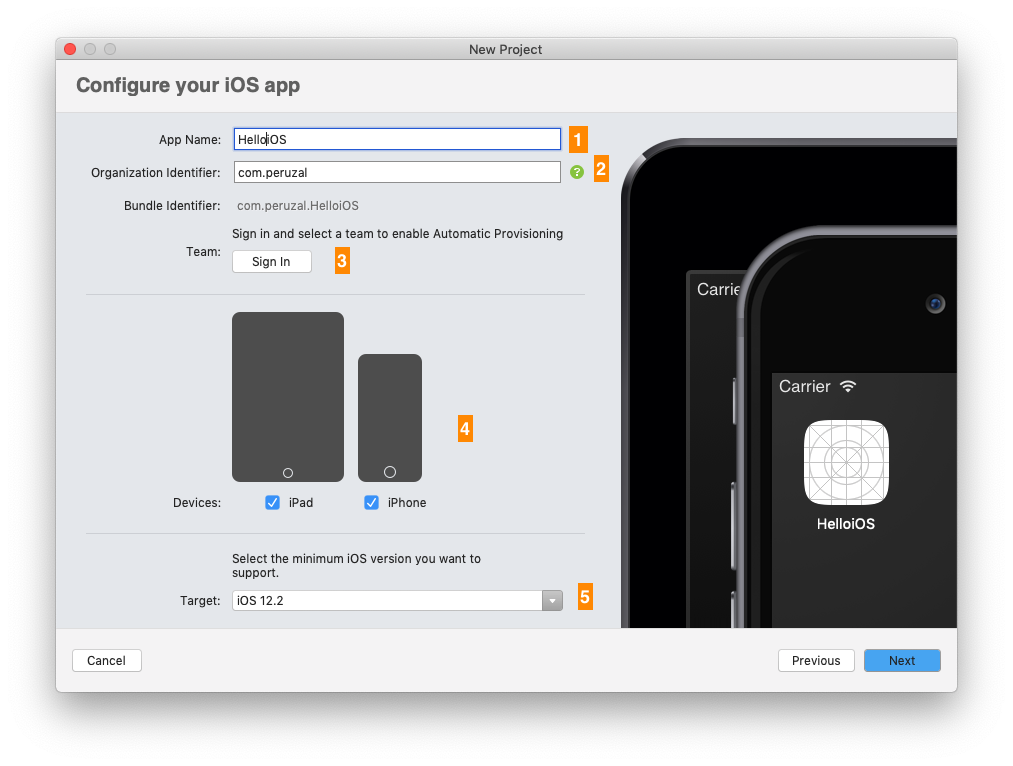
From the figure above:
- Choose iOS -> App
- Select the Single View App
Templates
Visual Studio provides various starter templates. In development your app, you can select other templates based on your app requirements.
Configure project
- App Name: This is the name of your app
- Organization Identifier: Is used to created a unique name for you app on the App Store. Each app should have a unique name. You can use the reverse DNS of your organization since its guaranteed to be unqiue.
- Team: You can sign in if you have an Apple Developer account. Visual Studio will automatically manage the certificates for you. 4: Devices: The devices to target with your app
- Target: The iOS versions the app should run on. Choose a lower version to target older iOS versions.
Exploring the project
Once the project is created, you should have the project as the figure below.

Run the app
By default, Visual Studio will select the latest iPhone emulator, you can change which emulator to run your app on.
- Click the Play button to run the app on the emulator.

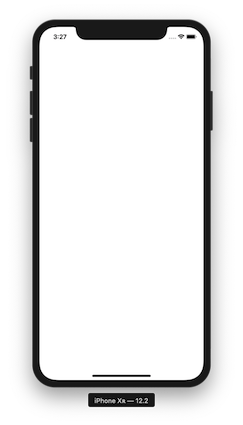
No view displayed
Unfortunately the default template for Visual Studio 2019 on a Mac does not contain any views, so when you run, you will see a blank white screen.
Adding views
We are going to add a label using the Storyboard. You create your UI in iOS using storyboards.
- Open the Main.storyboard
- From the Toolbox drag the Label
- Use the guides and align the Label at the center
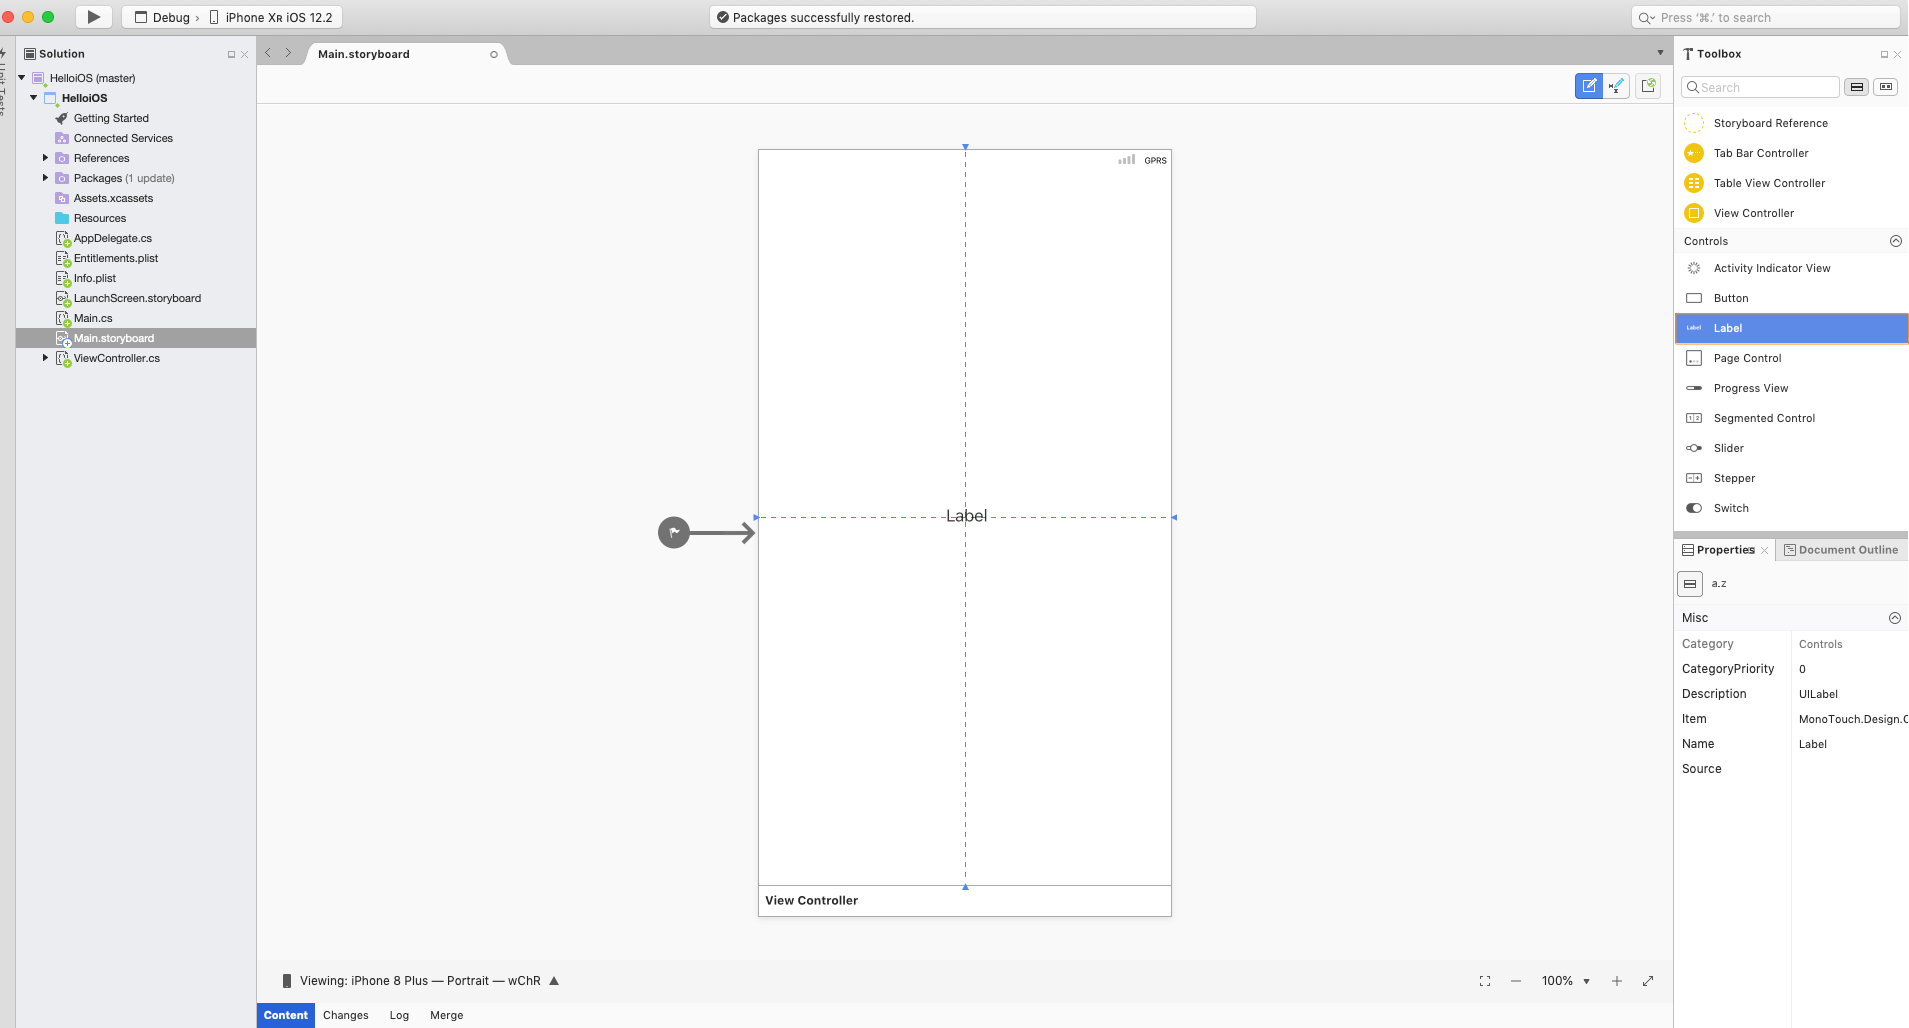
- Add the text "Hello World"
- Resize the label
- Align the text using the Properties inspector window
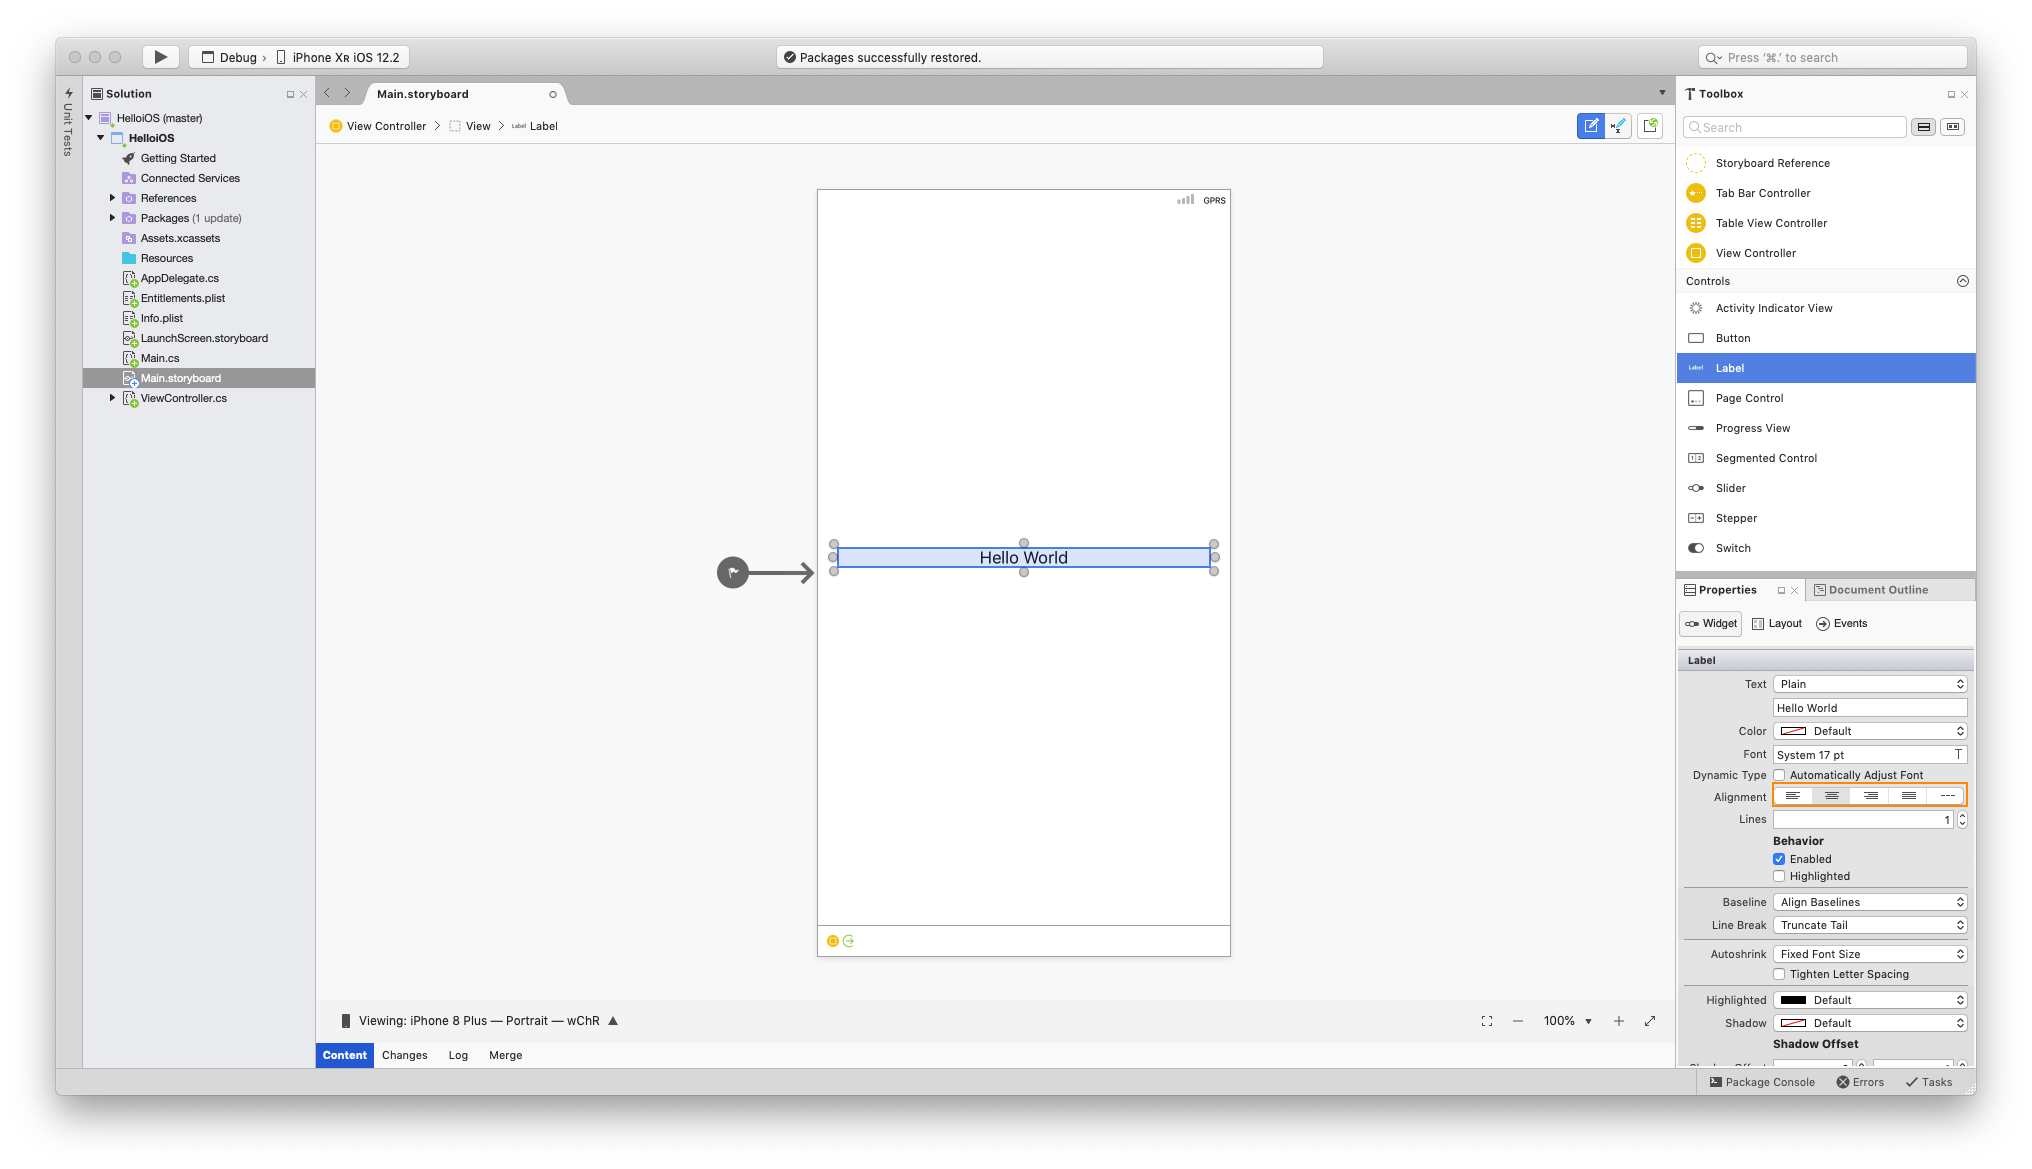
- Run again, and you should see the emulator with the Hello World text displayed on the center
Exploring the project
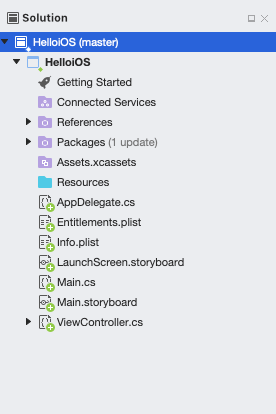
On the left is the solution Pad, which contains the directory structure and all the files associated with the solution:
The items in the project include:
- References - Contains the assemblies required to build and run the application.
- Packages - The packages directory contains ready-made NuGet packages.
- Assets.xcassets - The asset catalog contains image file for the different resolutions.
- Resources - The resources folder stores other media.
- Main.cs – This contains the main entry point of the application. To start the application, the name of the main application class, the AppDelegate, is passed in.
- AppDelegate.cs – This file contains the main application class and is responsible for creating the Window, building the user interface, and listening to events from the operating system.
- Main.storyboard - The Storyboard contains the visual design of the application’s user interface. Storyboard files open in a graphical editor called the iOS Designer.
- LaunchScreen.storyboard - The storyboard used to create the splash screen. This is automatically displayed when the app starts.
- ViewController.cs – The view controller powers the screen (View) that a user sees and touches. The view controller is responsible for handling interactions between the user and the View.
- ViewController.designer.cs – The designer.cs is an auto-generated file that serves as the glue between controls in the View and their code representations in the view controller.
- Info.plist – The Info.plist is where application properties such as the application name, icons, launch images, and more are set.
- Entitlements.plist - The entitlements property list lets us specify application capabilities (also called App Store Technologies) such as iCloud, PassKit, and more.
The figure below shows the Assets.xcassets showing the AppIcon with the different images for the different devices.

The figure below show the Visual Studio editor with the various window panes open:
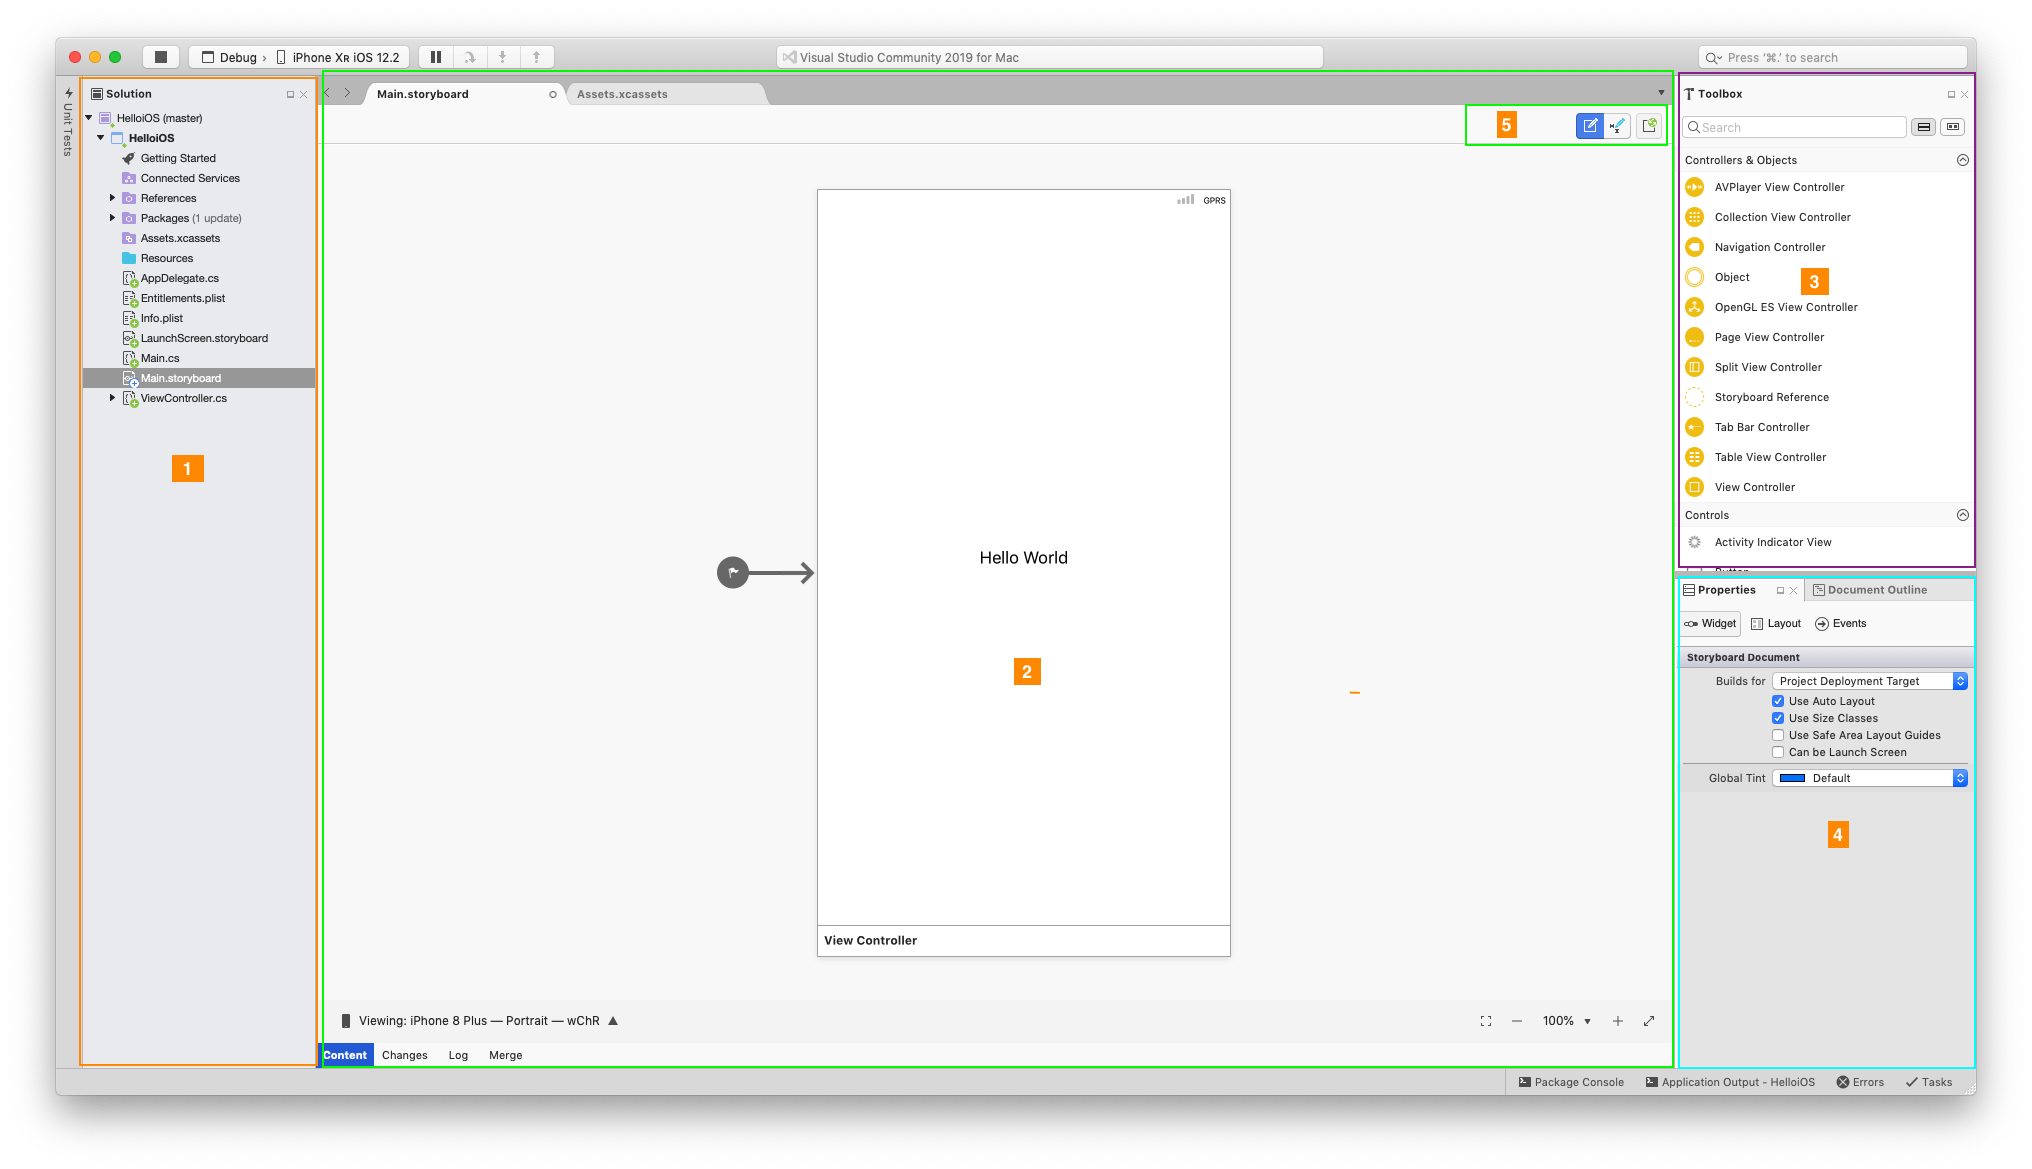
- Solution pane: Show the files in th eproject
- Main editor area: Shows the code editor or the storyboard
- Toolbox: You drag the various controls from here onto the storyboard
- Properties pane: used to change the properties of the views on the storyboard
- The controls used to switch the editor to between edit mode and constraints mode. Constraints are used to position the views correctly on the different device resolutions.
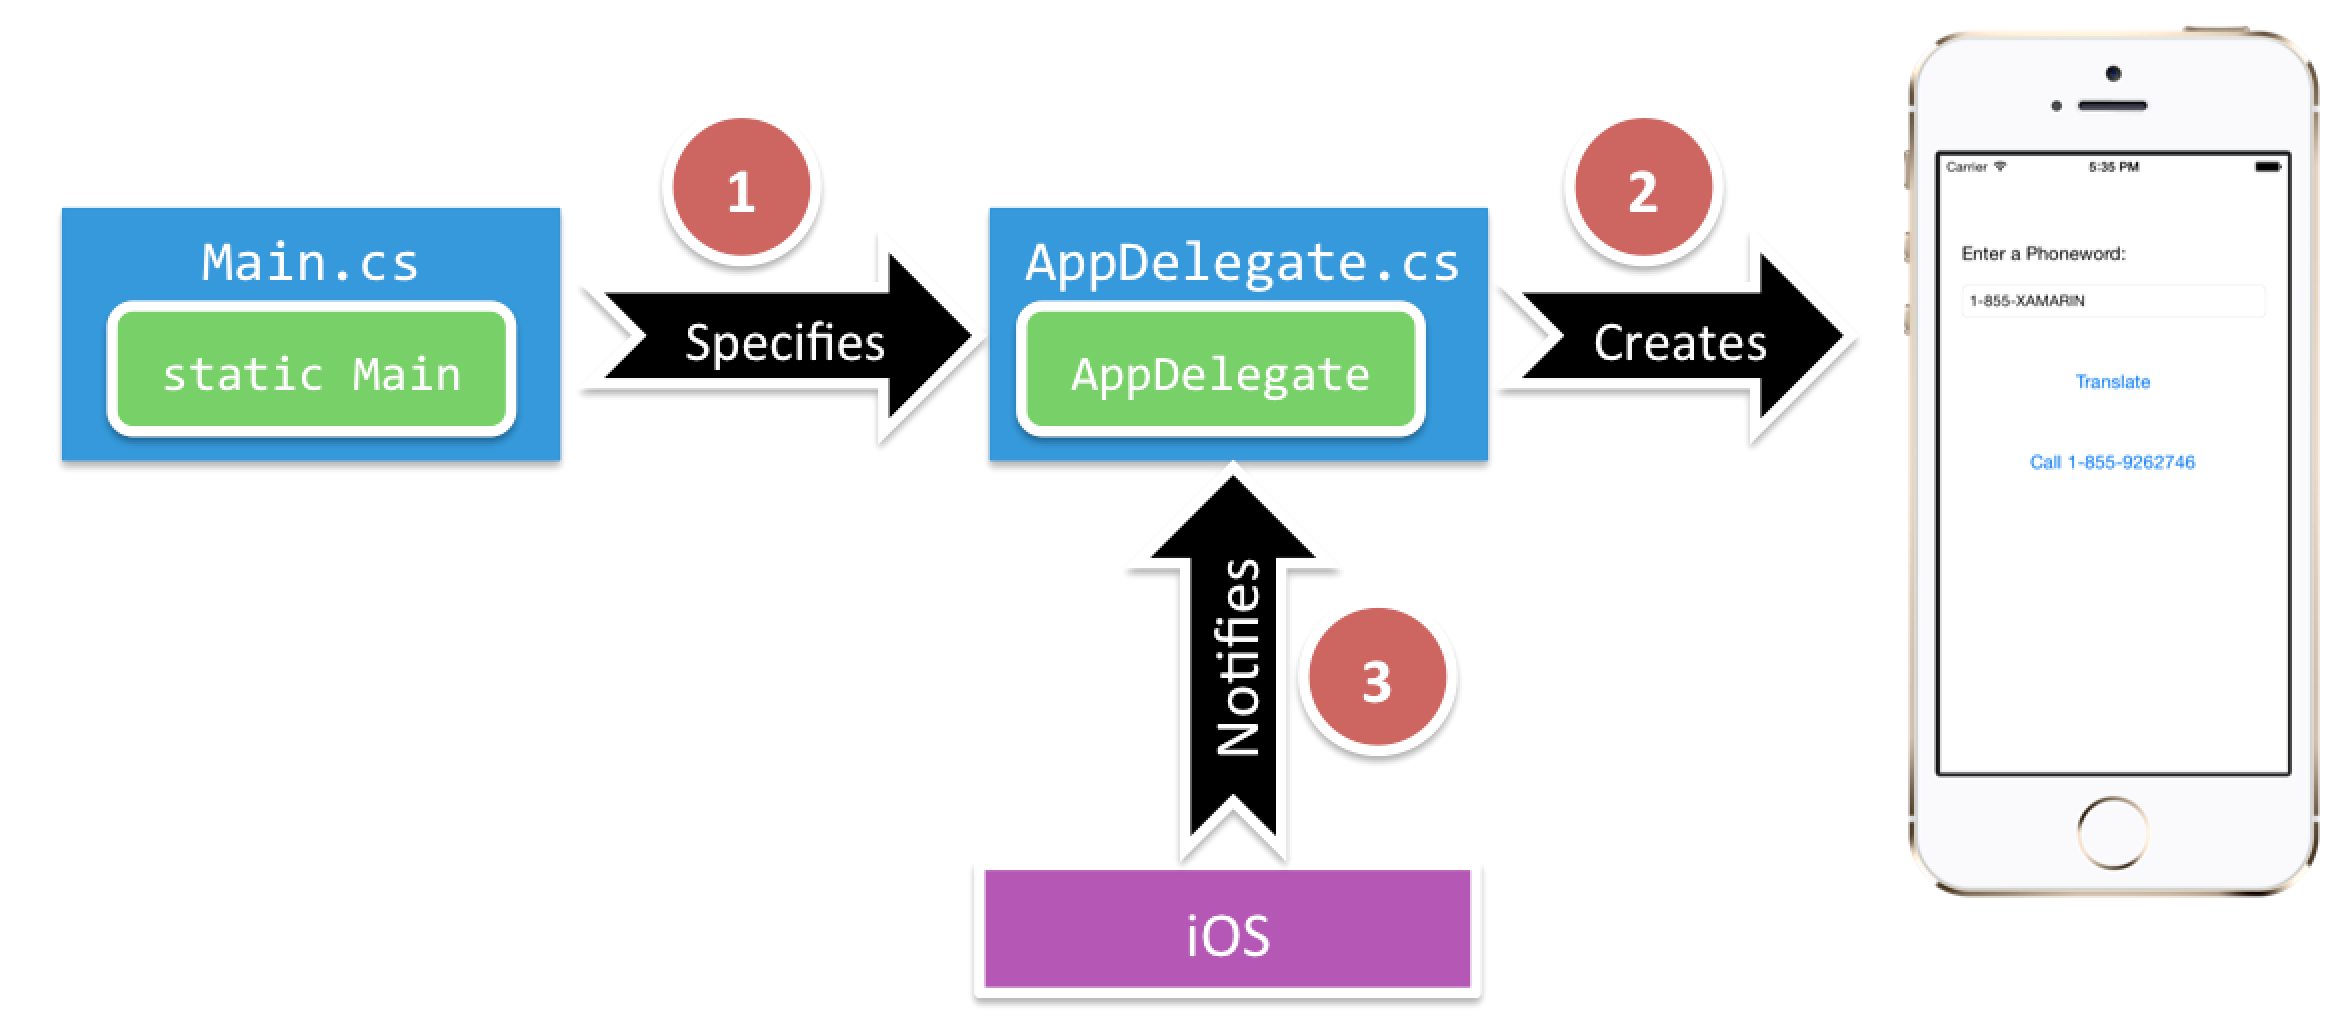
Application fundamentals
Let's explore how an iOS application is loaded.
- The entry point into an iOS application is defined in
Main.csin theMain()method1 2 3 4 5 6 7 8 9 10
public class Application { // This is the main entry point of the application. static void Main(string[] args) { // if you want to use a different Application Delegate class from "AppDelegate" // you can specify it here. UIApplication.Main(args, null, "AppDelegate"); } }
-
The
Main.csuses a class that derives from theUIApplicationDelegateto handle system wide events. TheMain.cshands over control to theAppDelegateclass -
The
ApplicationDelegateimplements various methods to handle system wide events. In theFinishedLaunchingit loads the storyboard file. The main story board file is defined in theInfo.plistfile.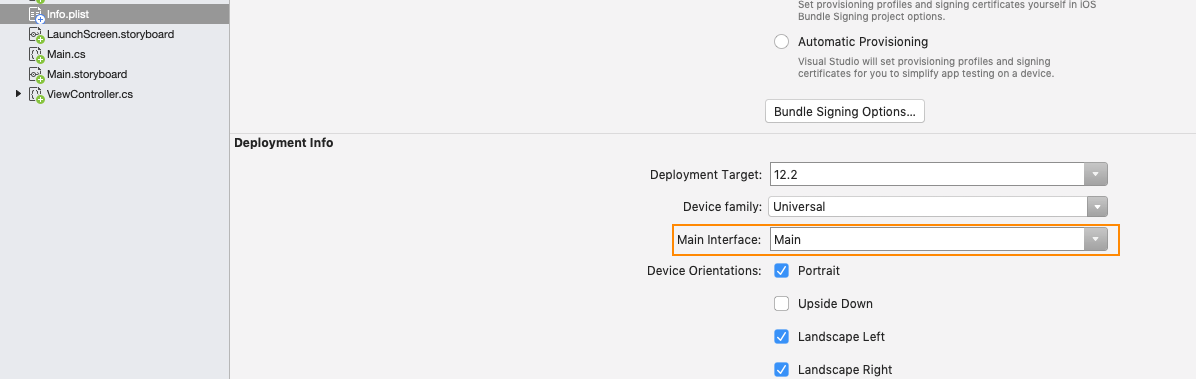
The code below shows the UIApplicationDelegate derived class that loads the story board
1 2 3 4 5 6 7 8 9 10 11 12 13 14 15 16 17 18 19 20 21 22 | // The UIApplicationDelegate for the application. This class is responsible for launching the // User Interface of the application, as well as listening (and optionally responding) to application events from iOS. [Register("AppDelegate")] public class AppDelegate : UIApplicationDelegate { // class-level declarations public override UIWindow Window { get; set; } public override bool FinishedLaunching(UIApplication application, NSDictionary launchOptions) { // Override point for customization after application launch. // If not required for your application you can safely delete this method return true; } ... } |
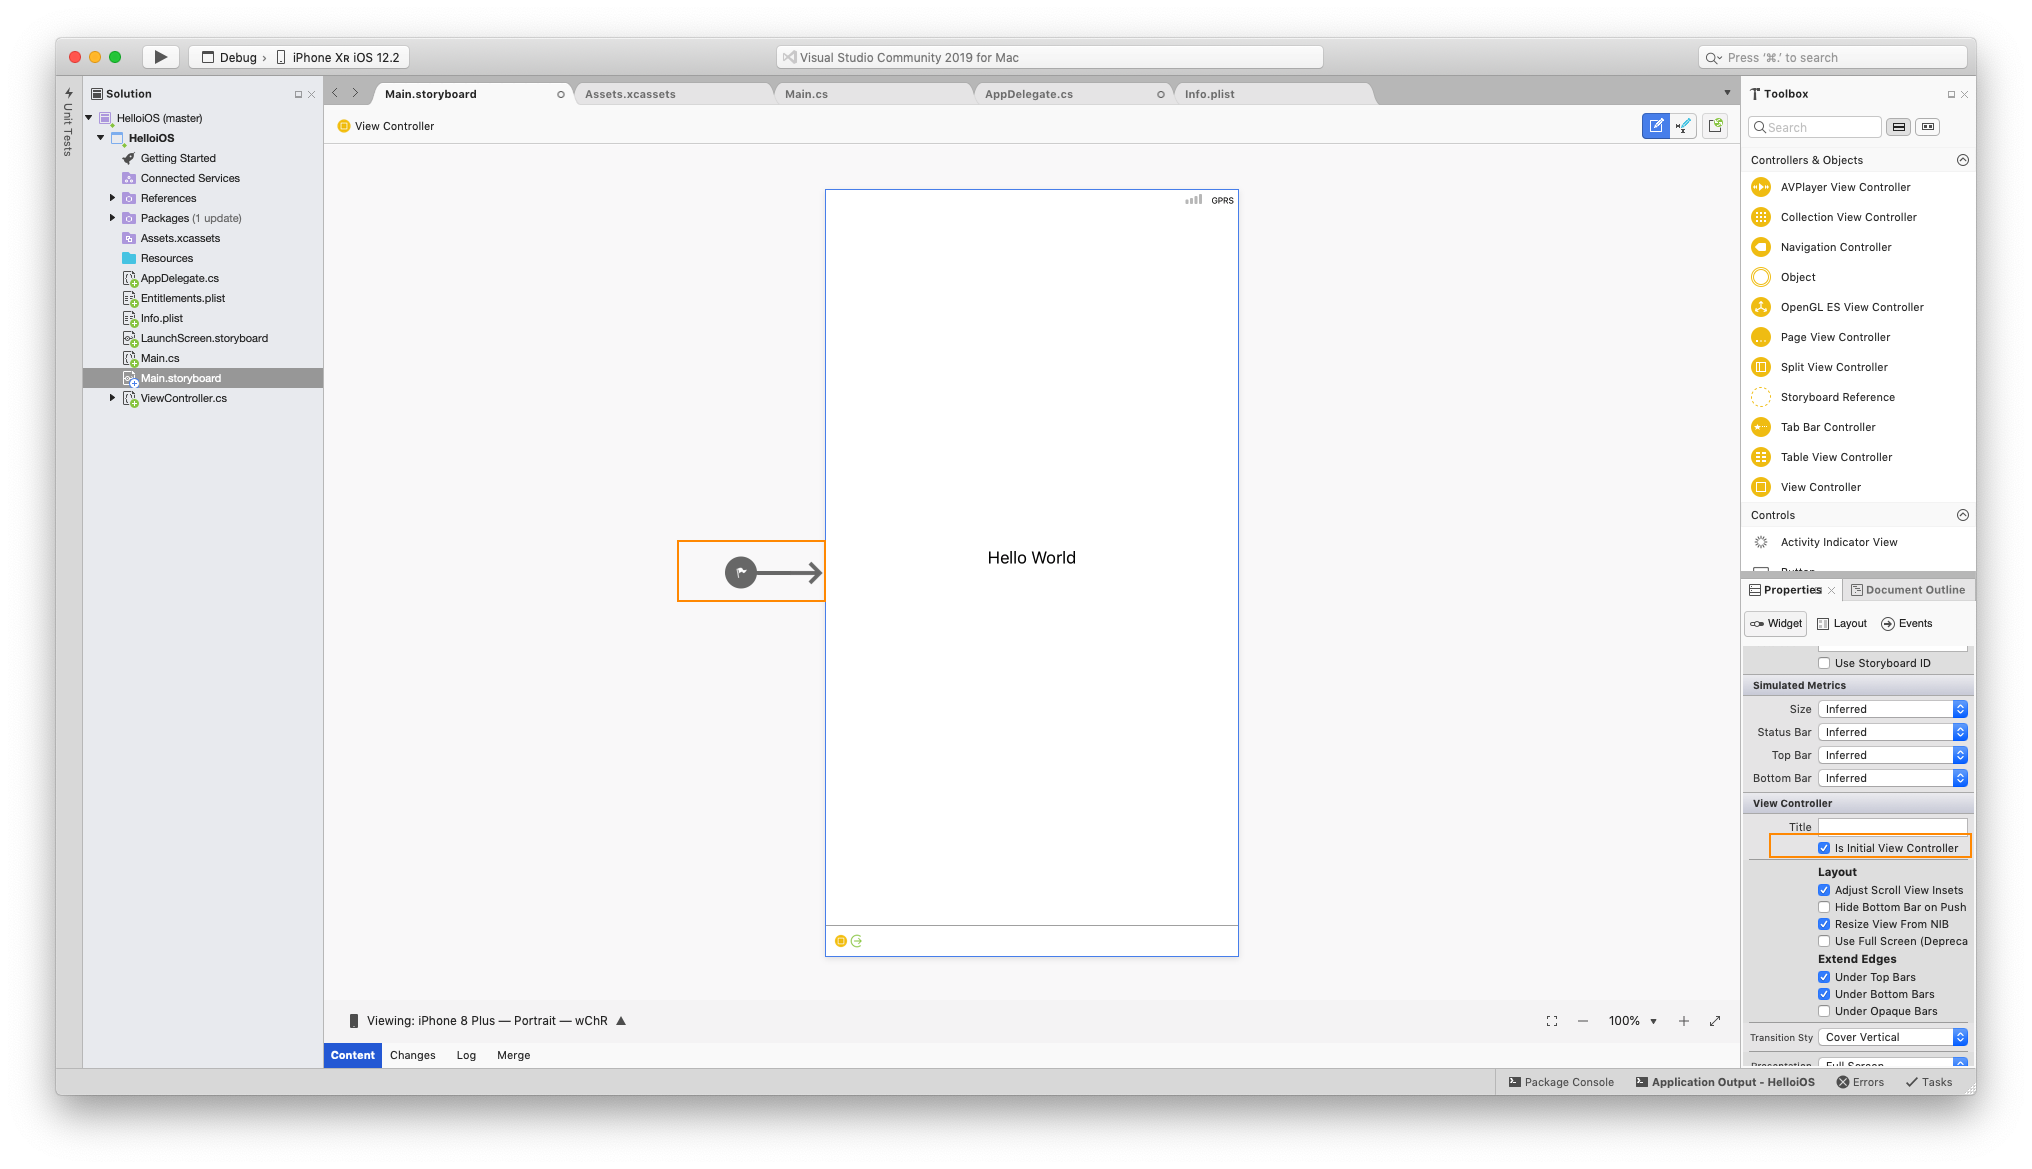
- When the
Main.storyboardloads, it defines theInitial Root View Controller
The figure below summarises how the app is loaded and the different files involved: