TableView
The Table View is one of the most commonly used control. Its found in almost every iOS app. The Table View display data as rows. Most Table Views are highly customized and might not appear as one.
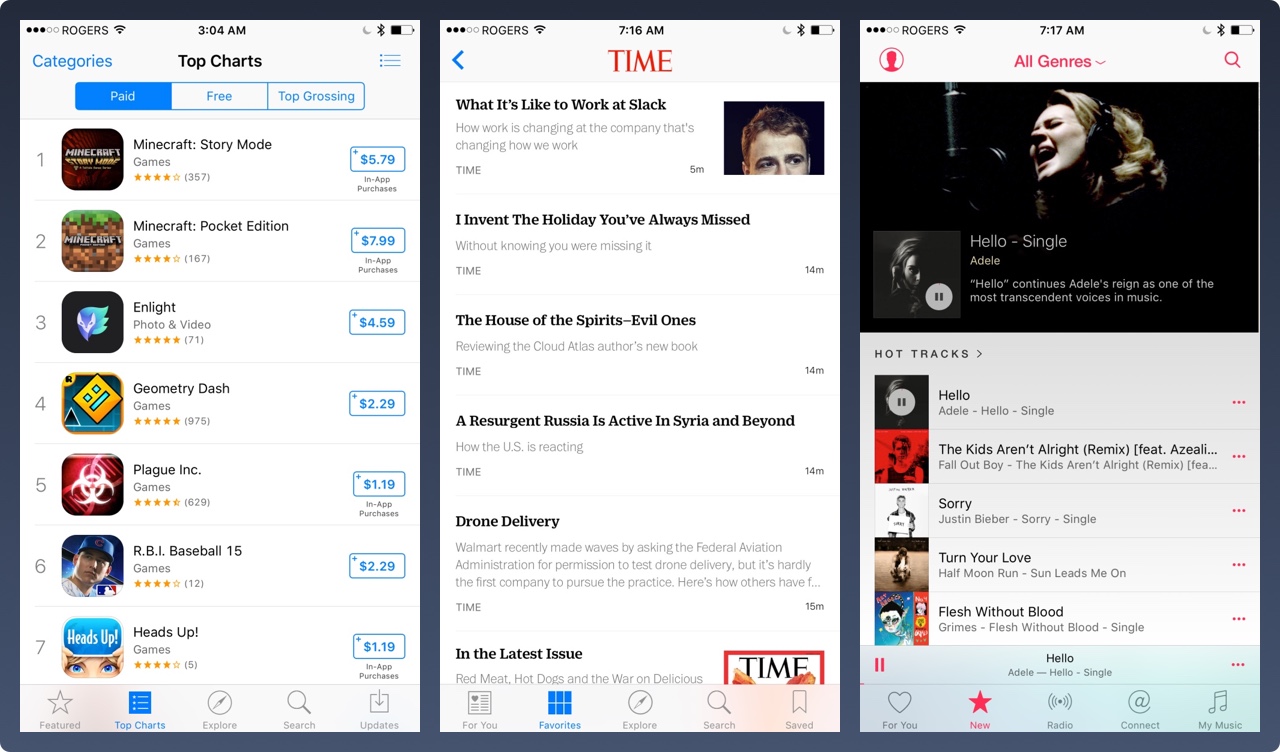
Example of TableView in Apps
Apps such as Whatsapp, Contacts, TED use Table Views for displaying content as rows.
More Examples of Apps using TableView
The Twitter, Contacts, and the Yelp apps are all using the table view.
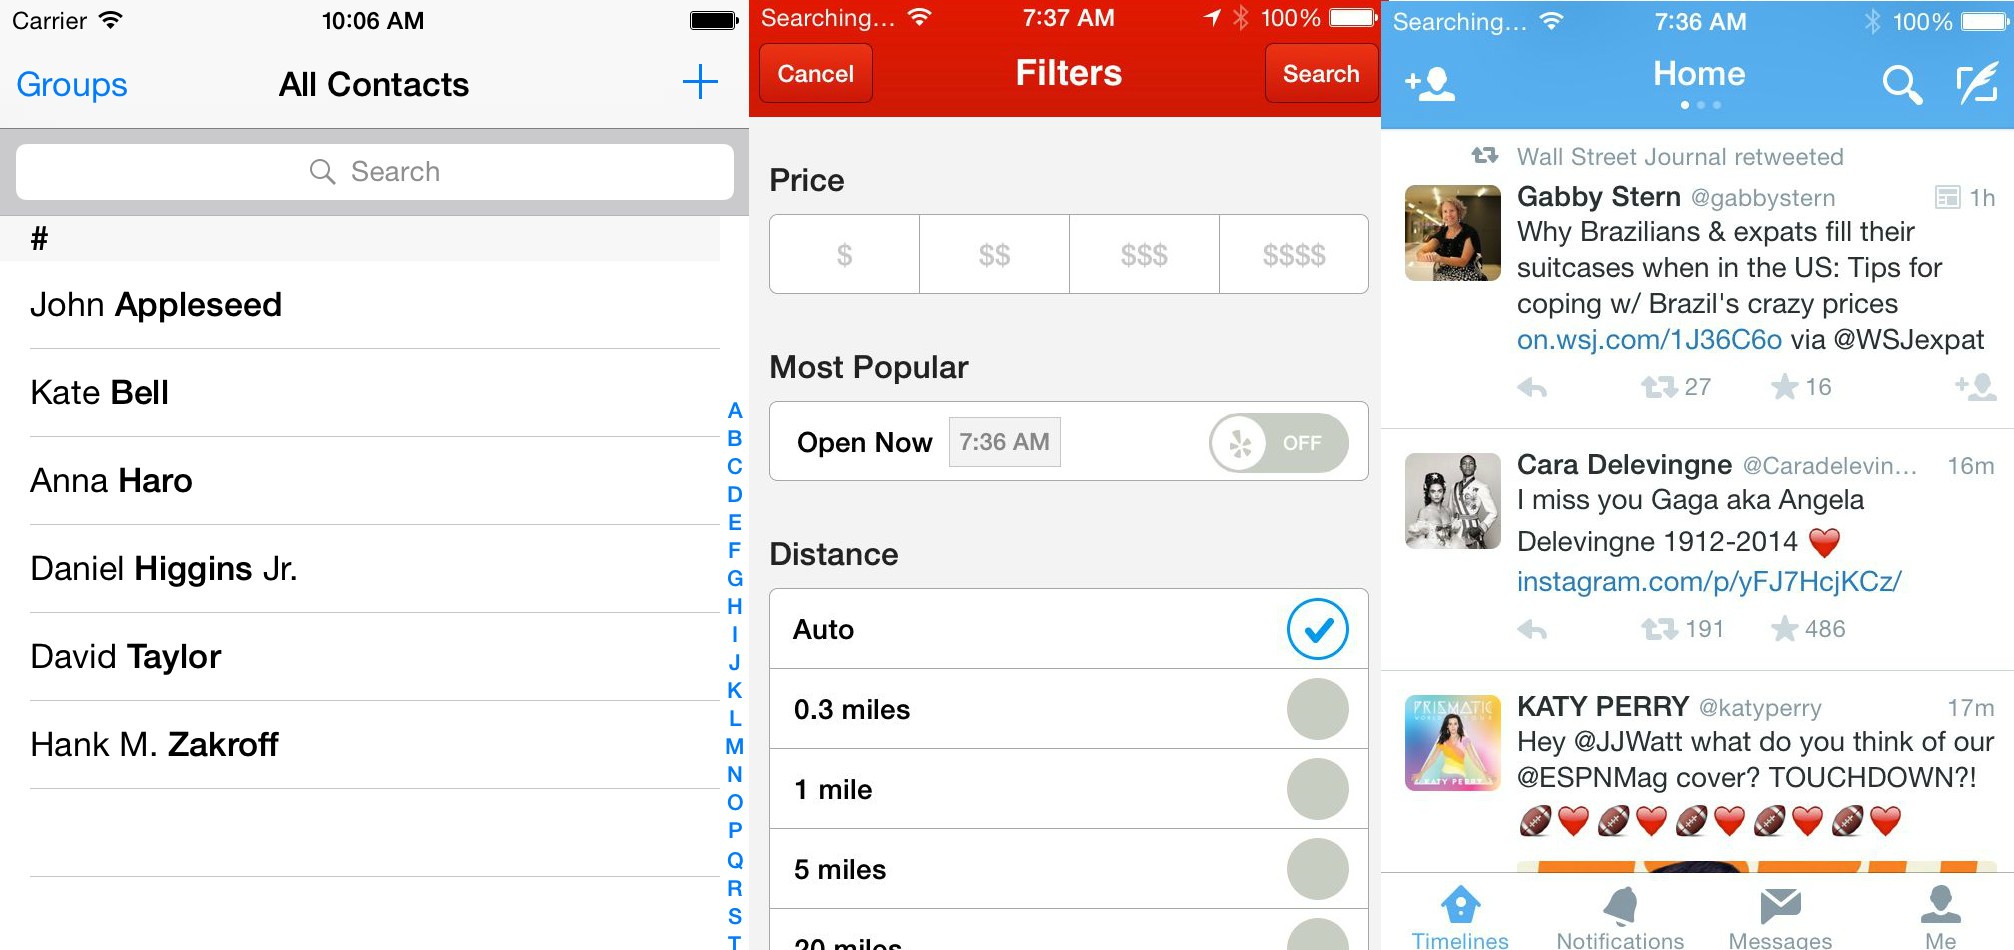
Table View Content
A table view can contain static or dynamic data.
Static Table View Content
A static table can only be created inside a TableViewController. A TableViewController, is a ViewController that derives from the UITableViewController and has its view, as the the table view. Remember View Controller has its view as a view, which derives from UIView, but the UITableViewController controller's view derives from UITableView.
Table views with static contents are usually used for displaying a settings screen, like the iOS Settings app, or the Google Maps iOS app.
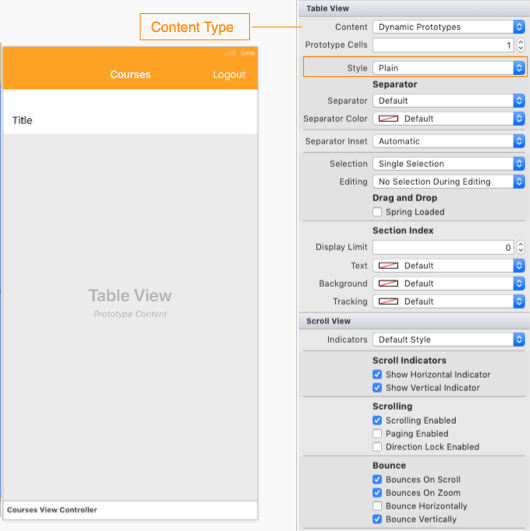
Dynamic Table View Content
A dynamic table view needs a data source to provide its content. When designing a dynamic table view, you will need to provide a prototype cell in the StoryBoard. The table view will ask its data source and use the prototype to display the content.
You can add more prototype cell in the StoryBoard. Each prototype cell will need a Reuse Identifier. This is a string used by the table view to deque cells. The table view efficiently manages displaying data by only creating cells for the visible rows onscreen. It ask the the data source to provide more data as you scroll.
Table View Style
The table view can be plain or grouped. You can customize the plain table view with your own colors and design.
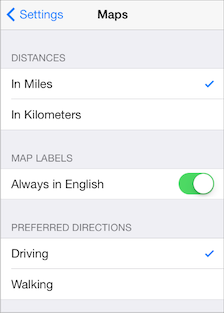
Table View Cell
Each row of the table view is of type UITableViewCell. The table comes with default table view cells you can use. The cells have a Title Label, Detail Label, and ImageView.
If you want to create your own, you can change the style fo a Custom cell type.
Providing Data to the Table View
The table view uses a data source to provide the data to display. This is done using a protocol. A protocol is contract in iOS, it can have required and optional methods that needs to be implemented, by the class. The protocol name is UITableViewDataSource, this is implemented as a generic class in Xamarin. For handling cell selection and other table view functions, the table uses the UITableViewDelegate protocol.
Xamarin instead uses a class UITableViewSource that handles both the functions of the UITableViewDataSource and UITableViewDelegate protocols.
Dynamic table view data with UITableViewSource
To use a dynamic table view, you need to perform the following steps:
- Add a table view inside a view controller on the storyboard
- Create a class that derives from
UITableViewDataSource - Implement the methods in the
UITableViewDataSourcederived class
Add table view in the story board
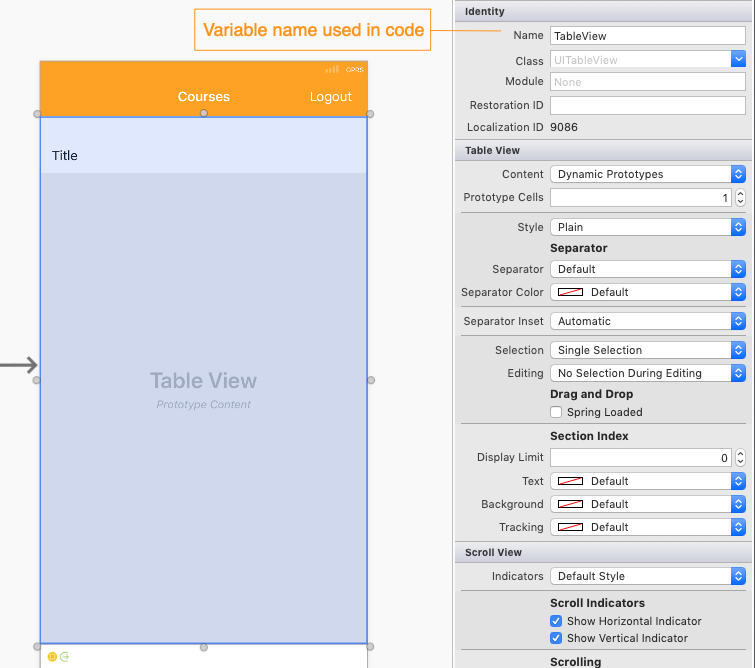
Drag a table from the Toolbox and add it to the view controller. Change the Name under Identity section on the Properties inspector and call it TableView.
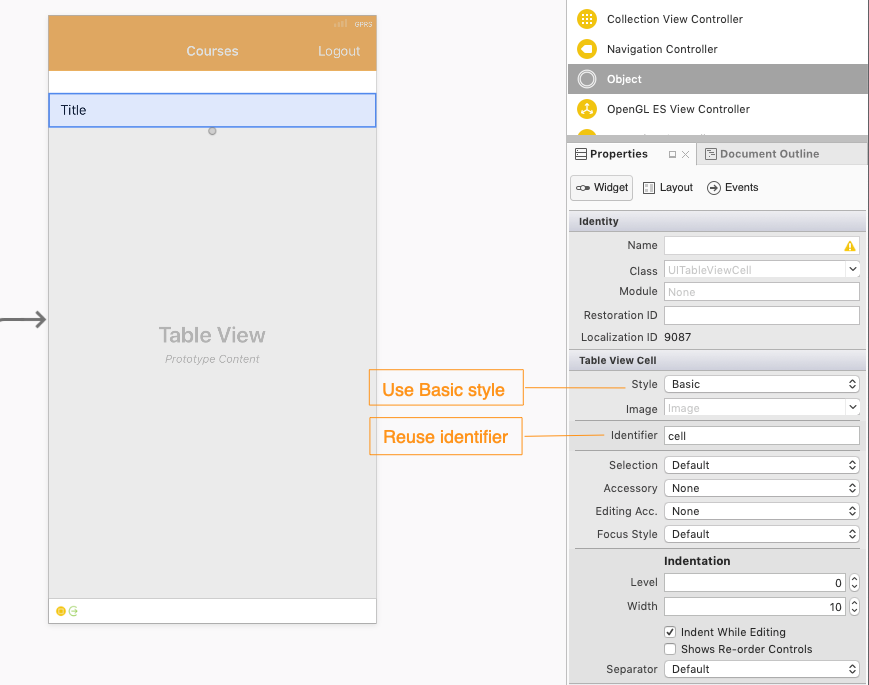
Select the prototype cell and change the Style to Basic. Add a an Identifier and add the text cell. The identifier is used to for recycling table view cells.
Create the class to provide data
Create a class that derives from UITableViewDataSource as follows :
1 2 3 4 5 6 7 8 9 10 11 12 | class CoursesDataSource : UITableViewSource { public override UITableViewCell GetCell(UITableView tableView, NSIndexPath indexPath) { throw new NotImplementedException(); } public override nint RowsInSection(UITableView tableview, nint section) { throw new NotImplementedException(); } } |
You will need to implement the two methods. You need to return the number of rows in each section in the RowsInSection() method and a provide the cell for each row in the GetCell() method.
Add a list of strings field
1 2 3 | List<string> courses = new List<string>() { "Xamarin Forms", "ReactJS", "C# Programming", "Ruby Programming" }; |
and return the count in the RowsInSection() method:
1 2 3 4 | public override nint RowsInSection(UITableView tableview, nint section) { return courses.Count; } |
Implement the GetCell by dequeuing a reusable cell using the identifier defined in the story board:
1 2 3 4 5 6 7 8 9 10 11 12 | public override UITableViewCell GetCell(UITableView tableView, NSIndexPath indexPath) { const string identifier = "cell"; var cell = tableView.DequeueReusableCell(identifier, indexPath); if (cell == null) { cell = new UITableViewCell(UITableViewCellStyle.Default, identifier); } cell.TextLabel.Text = courses[indexPath.Row]; return cell; } |
The complete class for the UITableViewSource should be as follows:
1 2 3 4 5 6 7 8 9 10 11 12 13 14 15 16 17 18 19 20 21 22 23 | class CoursesDataSource : UITableViewSource { List<string> courses = new List<string>() { "Xamarin Forms", "ReactJS", "C# Programming", "Ruby Programming" }; public override UITableViewCell GetCell(UITableView tableView, NSIndexPath indexPath) { const string identifier = "cell"; var cell = tableView.DequeueReusableCell(identifier, indexPath); if (cell == null) { cell = new UITableViewCell(UITableViewCellStyle.Default, identifier); } cell.TextLabel.Text = courses[indexPath.Row]; return cell; } public override nint RowsInSection(UITableView tableview, nint section) { return courses.Count; } } |
Connect table view to data source
The last piece is to connect the table view to the data source. In the ViewDidLoad, add the following
1 2 3 4 5 | public override void ViewDidLoad() { base.ViewDidLoad(); TableView.Source = new CoursesDataSource(); } |
When you now run, you should get the courses displaying.